
Choking Rescue for Infants and Children: A Step-by-Step Guide
Oct 13
10 min read

Key Highlights
Choking can happen in seconds, and a child who cannot cough, cry, or breathe needs help right away.
For infants under 1 year, use 5 back blows and 5 chest thrusts. Never use abdominal thrusts on a baby.
For children over 1 year, use back blows and abdominal thrusts, based on the training you received.
Call 911 or ask someone nearby to call while you start helping.
If the child becomes unresponsive, lower them to the ground and start CPR.
Hands-on training gives you the confidence to act fast. 30:2 Rescue LLC offers CPR and first aid classes in Pasadena and across Southern California.
Introduction
Few moments are as frightening as watching a child choke. One second they are eating, playing, or exploring the world with their hands and mouth. The next, they are silent, wide-eyed, and unable to breathe. Parents, grandparents, babysitters, teachers, and daycare staff all face this risk.
The good news is that you can learn what to do. Choking rescue for infants and children follows clear steps, and they work best when you know them before an emergency. This guide explains how to recognize choking, what to do for babies and older children, how to respond if a child stops responding, and how to lower the chance it happens at all.
This article is general education and does not replace hands-on training. Read it, share it, and then consider taking a certified class so your hands know the steps as well as your head does.
Understanding Choking in Infants and Children
Choking happens when something blocks the airway and stops air from reaching the lungs. The blockage can be a piece of food, a small toy, a coin, or any object small enough to fit in a child's mouth. Because the airway is blocked, the brain and body quickly begin to run short of oxygen. That is why speed matters.
Why Young Children Are at Higher Risk
Children choke more easily than adults for several reasons:
Their airways are small, so even a small object can block them.
They are still learning to chew and swallow well.
Babies and toddlers explore by putting things in their mouths.
Young children often run, laugh, cry, or talk while eating.
Back teeth that grind food do not fully develop until later in early childhood.
Because of these factors, choking is one of the leading causes of injury and death in young children, especially those under 4 years old.
Common Choking Hazards
Food causes many choking events, but household items are also a risk. Watch for these:
Whole grapes, hot dogs, and sausages
Raw carrots, apple chunks, and other hard raw foods
Popcorn, nuts, seeds, and hard candy
Chewing gum and sticky sweets
Spoonfuls of peanut butter
Coins, buttons, and small toy parts
Balloons, including pieces of a popped balloon
Button batteries and small magnets, which are medical emergencies even if the child is breathing
Balloon pieces deserve extra caution because they can mold to the airway and are hard to remove.
How to Recognize Choking
Before you can help, you need to know whether the child is truly choking. Coughing and gagging are not always the same as a blocked airway. Telling the difference decides what you do next.
Mild Choking Versus Severe Choking
A child with a partial blockage can still move some air. A child with a full blockage cannot. Use this table as a quick guide.
Sign | Mild choking | Severe choking |
Cough | Strong, forceful cough | Weak, silent, or no cough |
Sound | Can cry, talk, or make noise | Cannot cry, talk, or make sounds |
Breathing | Breathing, though it may sound noisy | Struggling to breathe or not breathing |
Skin color | Normal or slightly flushed | Pale, gray, or blue lips and face |
Behavior | Upset but alert | Panicked, clutching throat, then limp |
What to Do for Mild Choking
If the child is coughing hard and can still breathe, do not hit their back or try to pull anything out of the mouth. A strong cough is the body's best way to push the object out. Stay close, stay calm, and encourage the child to keep coughing. Watch closely. If the cough weakens, the sound stops, or the child struggles to breathe, treat it as severe choking.
Signs of Severe Choking
Look for these warning signs:
The child cannot cough, cry, or speak
A high-pitched noise, or no sound at all, when trying to breathe
Skin, lips, or fingernails turning blue or gray
Hands reaching toward the throat
Wide, frightened eyes
Loss of consciousness
An infant may not clutch at the throat. Look for a silent open mouth, a weak or absent cry, and color changes.
Before You Begin: Call for Help
If a child is severely choking, you need help on the way as soon as possible.
If another person is with you, tell them to call 911 and bring an AED if one is nearby.
If you are alone with a child who is still awake, give care first for about 2 minutes, then call 911.
If you are alone and have a phone, put it on speaker so you can call while you give care.
Even if you clear the airway and the child seems fine, they should be checked by a medical professional. Back blows, chest thrusts, and abdominal thrusts can cause internal injury, and some objects can move or cause swelling later.
Choking Rescue for Infants Under 1 Year

Babies are fragile, so the method is different from the one used for older children. For an infant, you use a combination of back blows and chest thrusts. Do not use abdominal thrusts on a baby.
Step 1: Position the Infant Face Down on Your Forearm
Sit or kneel. Place the baby face down along your forearm with the head lower than the chest. Hold the jaw gently with your thumb and fingers to support the head, and keep the fingers off the soft tissue of the throat. Rest your forearm against your thigh for support.
Step 2: Give 5 Back Blows
Using the heel of your free hand, give up to 5 firm back blows between the baby's shoulder blades. Each blow should be strong enough to try to move the object but controlled enough to protect the baby. Aim each blow upward and toward the head.
Step 3: Turn the Infant Face Up
If the object has not come out after 5 back blows, place your free hand on the back of the baby's head and neck. Sandwich the baby between your forearms and turn them over onto the other forearm, face up. Keep the head lower than the chest and rest your arm on your thigh.
Step 4: Give 5 Chest Thrusts
Place two fingers in the center of the baby's chest, just below the nipple line. Push down about 1.5 inches, then let the chest rise back up. Give up to 5 thrusts. Each thrust should be quick and firm.
Step 5: Repeat and Check the Mouth
Keep alternating 5 back blows and 5 chest thrusts until the object comes out, the baby starts to cough, cry, or breathe, or the baby becomes unresponsive. After each set, look in the baby's mouth. If you can see the object, remove it. If you cannot see it, do not poke around with your fingers. A blind finger sweep can push the object deeper.
Choking Rescue for Children Over 1 Year

For children older than 1 year, rescuers use abdominal thrusts, sometimes called the Heimlich maneuver, along with back blows depending on the training course. The Red Cross teaches 5 back blows followed by 5 abdominal thrusts for a choking child. Other programs may teach abdominal thrusts alone. Both approaches aim to push air out of the lungs and move the object. Ask your instructor which method applies to the course you take.
Step 1: Get Behind the Child
Stand or kneel behind the child. For a smaller child, you may need to kneel so you are at the right height. Wrap your arms around their waist.
Step 2: Give 5 Back Blows
Lean the child forward at the waist. With the heel of your hand, give up to 5 firm blows between the shoulder blades. Check whether the object has come out after each blow.
Step 3: Make a Fist and Find the Right Spot
Make a fist with one hand. Place the thumb side against the middle of the child's abdomen, just above the belly button and well below the breastbone. Cover your fist with your other hand.
Step 4: Give 5 Abdominal Thrusts
Pull inward and upward with quick, firm thrusts. Each thrust should be a separate, distinct movement. Give up to 5 thrusts, then check the mouth.
Step 5: Repeat Until the Object Comes Out
Keep alternating 5 back blows and 5 abdominal thrusts until the object is out, the child can breathe, cough, or cry, or the child stops responding. If the child is very small, use less force. If the child is larger, you may need more force, but always stay controlled.
What to Do If the Child Becomes Unresponsive
Sometimes the object does not come out, and the child goes limp. This is an emergency and the steps change.
Lower the Child to the Ground
Place the child on a firm, flat surface. If you are alone and have not yet called 911, call now or use speakerphone.
Start CPR
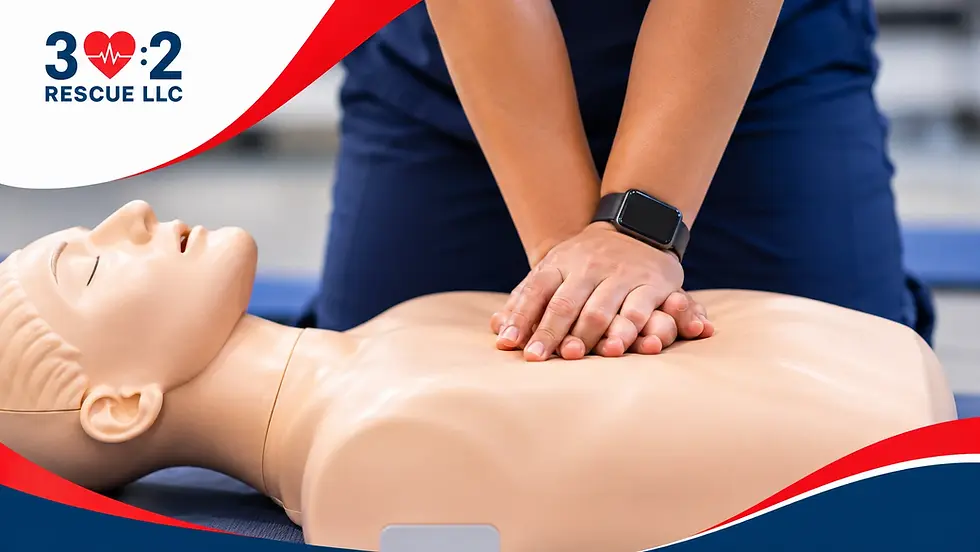
Begin CPR right away, starting with chest compressions. For an infant, use two fingers in the center of the chest. For a child, use one or two hands on the lower half of the breastbone depending on the child's size. Compress about one-third the depth of the chest at a steady, fast pace.
Check the Mouth Before Each Set of Breaths
After each set of 30 compressions, open the child's mouth and look inside. If you see the object, carefully remove it. If you do not see it, give breaths and continue with compressions. Do not sweep the mouth blindly.
Keep Going Until Help Arrives
Continue CPR until the child starts to breathe, an AED is ready to use, trained help takes over, or you are too exhausted to continue. If an AED arrives, turn it on and follow the voice prompts. Use pediatric pads if you have them.
Common Mistakes to Avoid
In a stressful moment, people often reach for the wrong response. Keep these points in mind:
Do not slap or pound a child who is coughing strongly. Let the cough do its job.
Do not use abdominal thrusts on an infant. The method for babies is back blows and chest thrusts.
Do not perform blind finger sweeps. Only remove an object you can see.
Do not hold a child upside down by the legs. This does not work and can cause injury.
Do not give water, bread, or other food to try to push the object down.
Do not wait to call for help. Delay can cost precious minutes.
Do not skip the medical check afterward. Even a successful rescue needs follow-up.
How to Prevent Choking at Home
Rescue skills matter, but prevention is better. Small changes in your daily routine can lower the risk a great deal.
Make Food Safer
Cut round foods like grapes, cherry tomatoes, and hot dogs into small pieces. Cut them lengthwise first, then into smaller bites.
Cook hard fruits and vegetables until soft, or grate them.
Spread peanut butter thinly instead of serving it by the spoonful.
Avoid whole nuts, popcorn, hard candy, and chewing gum for young children.
Remove seeds and pits from fruit.
Create a Safer Eating Routine
Have children sit down while they eat.
Stay with them during meals and snacks.
Avoid feeding children while they walk, run, play, or ride in a car.
Teach children to chew well and take small bites.
Discourage talking, laughing, or playing with food while eating.
Check the Home for Small Objects
Keep coins, batteries, magnets, and small toys out of reach of babies and toddlers.
Check toys for loose parts and follow the age labels.
Keep older siblings' toys with small parts in a separate space.
Pick up popped balloon pieces right away.
Store button batteries in a locked place.
A simple test is to use a toilet paper tube. If an object fits inside the tube, it is small enough to block a young child's airway.
Why Hands-On CPR and First Aid Training Matters
Reading about choking rescue is a strong start, but practice is what builds confidence. In a class, you can work with infant and child manikins, feel how hard to push, and get feedback from an instructor. That experience helps you stay steady if a real emergency happens.
30:2 Rescue LLC is an authorized training center for the American Red Cross and the American Heart Association. It offers CPR, first aid, AED, and BLS training in Pasadena, California, and serves the San Gabriel Valley and Southern California. Classes suit parents, caregivers, teachers, childcare workers, and healthcare staff.
If you care for children at home or at work, a class is one of the most useful steps you can take. To ask about class options, call 213-293-7408.
Conclusion
Choking rescue for infants and children comes down to a few clear actions. Recognize the signs of severe choking. Call for help. For a baby, give 5 back blows and 5 chest thrusts. For an older child, give back blows and abdominal thrusts as taught in your course. If the child stops responding, start CPR and check the mouth before each set of breaths.
Prevention gives you an extra layer of protection. Cut food into small pieces, keep small objects out of reach, and watch young children while they eat. Then take a hands-on class so the steps feel natural when it counts. A few hours of training can make the difference for a child who cannot breathe.
Frequently Asked Questions
How do I know if my child is choking or just coughing?
A child who is coughing forcefully and can still cry or speak has a partial blockage. Let them cough and watch closely. A child who cannot cough, cry, or speak, or who has blue lips and a panicked look, is severely choking and needs immediate help.
Can I use abdominal thrusts on a baby?
No. Abdominal thrusts are not used for infants under 1 year because they can injure a baby's organs. Use 5 back blows and 5 chest thrusts instead.
Should I take my child to a doctor after a choking event?
Yes. Even if the object came out and the child seems fine, a medical check is wise. Rescue maneuvers can cause bruising or internal injury, and some children develop swelling or breathing problems later.
What if I am alone with the child?
If the child is awake and choking, begin back blows and thrusts first. After about 2 minutes, call 911 if no one else has. If you have a phone, use speaker mode so you can call while you give care. If the child becomes unresponsive, start CPR and call 911 right away.
Should I try to remove the object with my fingers?
Only if you can see it. Blind finger sweeps can push the object farther down. Look in the mouth after each set of thrusts, and remove the object only when it is visible.
How often should I refresh my CPR and choking rescue skills?
Most CPR and first aid certifications are valid for two years. Many people take a refresher sooner if they care for young children, since skills fade with time. Regular practice helps you stay confident.
Where can I take a CPR and first aid class in Pasadena?
30:2 Rescue LLC offers CPR, first aid, AED, and BLS classes in Pasadena, California, for individuals, families, and workplace groups. Call 213-293-7408 to ask about upcoming classes.


Comments